

Vue3+TS+Vite 项目搭建笔记(更新中)
介绍
本章会教你在真实项目中如何搭建 VueRouter、Vuex、pinia、axios、主题切换等,你会见证一个后台管理系统的详细搭建过程。
效果图:


功能:
- 后台管理系统常用模块
- 登录加密
- 多标签页
- 全局面包屑
- 国际化
- 异常处理
- Utils工具包
- 可配置的菜单栏徽标
- 亮色 / 暗色 侧边栏
- 浅色主题 / 暗黑主题
- 丰富的个性化配置
- 可折叠侧边栏
- 支持内嵌页面
- 重载当前页面
- 动态路由支持自动重载
- 支持多级路由嵌套及菜单栏嵌套
- 分离路由与菜单设置
- 富文本编辑器
- 优秀的持久化存储方案
- 自定义登录重定向
创建项目
npm init vue@latest这一指令将会安装并执行 create-vue,它是 Vue 官方的项目脚手架工具。你将会看到一些诸如 TypeScript 和测试支持之类的可选功能提示:
✔ Project name: … vue-ts-vite-demo1
✔ Add TypeScript? … No / Yes
✔ Add JSX Support? … No / Yes
✔ Add Vue Router for Single Page Application development? … No / Yes
✔ Add Pinia for state management? … No / Yes
✔ Add Vitest for Unit Testing? … No / Yes
✔ Add an End-to-End Testing Solution? › No
✔ Add ESLint for code quality? … No / Yes
如果不确定是否要开启某个功能,你可以直接按下回车键选择 No
运行项目
安装依赖
npm install
or
yarn install
启动项目
npm run dev准备工作
Vite 配置路径别名
import { defineConfig } from 'vite'
import vue from '@vitejs/plugin-vue'
import path from "path"

export default defineConfig({
  plugins: [vue()],
  resolve: {
    alias: {
      "@": resovePath("src"),
      "@views": resovePath("src/views"),
      "@comps": resovePath("src/components"),
      "@imgs": resovePath("src/assets/img"),
      "@icons": resovePath("src/assets/icons"),
      "@utils": resovePath("src/utils"),
      "@plugins": resovePath("src/plugins"),
      "@styles": resovePath("src/assets/styles"),
    }
  },
})

function resovePath(paths) {
  return path.resolve(__dirname, paths)
}
安装Sass
yarn add sass配置 Sass variable and mixin
export default defineConfig({
  plugins: [vue()],
  css: {
    preprocessorOptions: {
      scss: {
        additionalData: `@import "@styles/variables.scss"; @import "@styles/mixin.scss";`
      }
    }
  }
}
创建 reset.scss 文件(重置HTML样式)
路径:/assets/styles/reset.scss
下载地址:https://www.qiniu.lingchen.kim/reset.scss
然后在 main.js 中 导入 reset.scss 文件
import '@/styles/reset.scss'VsCode
配置 vue3 代码片段
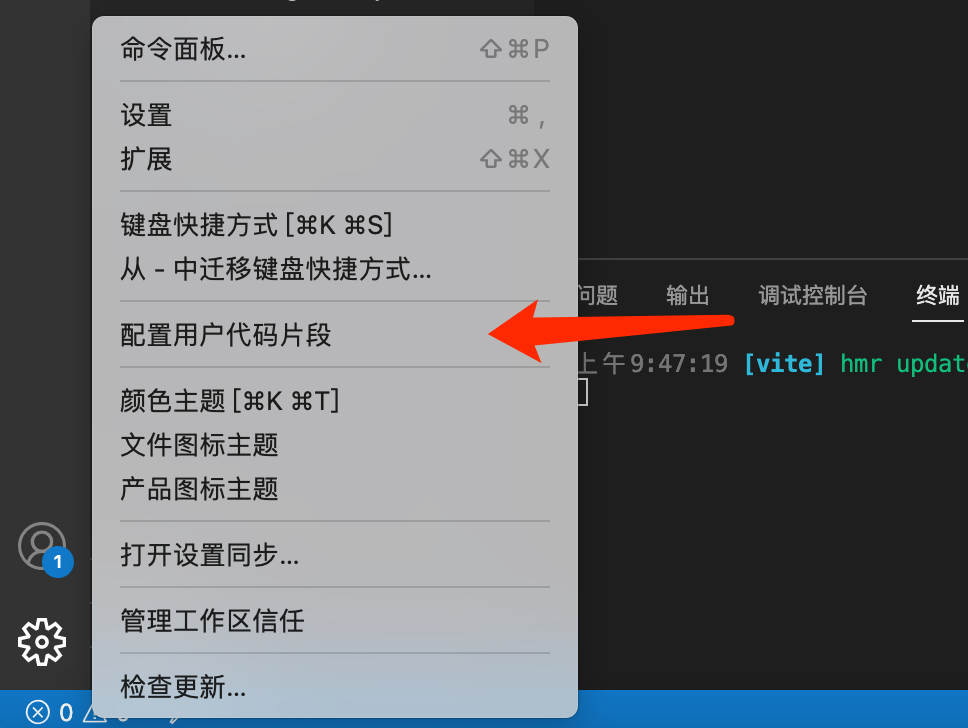
点击左下角设置->配置用户代码片段->新建全局代码片段->输入名称->填入代码片段

代码片段模版
{
  "Vue3快速生成模板": {
    "prefix": "v3",
    "body": [
      "<template>",
      "\t<div class=\"\">",
      "\t\t$3",
      "\t</div>",
      "</template>\n",
      "<script setup lang='ts'>",
      "import {} from 'vue'",
      "\t$2",
      "</script>\n",
      "<style lang=\"scss\" scoped>",
      "\t$4",
      "</style>"
    ],
    "description": "Vue3.2"
  }
}
最后新建一个空的vue文件,输入 v3 回车就能自动生成模版了,这里只生成了一个最简单的模版,有其他需要新增的可以自己补充。
<template><div class="">

  </div>
</template>

<script setup lang='ts'>
import {} from 'vue'

</script>

<style lang="scss" scoped>

</style>
安装 volar(vue3配套插件)
在 vscode 插件市场里面安装 volar 插件
删除项目不需要的文件
把 assets、components、views 下面没有用的文件删除
VueRouter(路由)
创建 home、login、user 三个页面
配置路由表
import { createRouter, createWebHistory } from 'vue-router'
import Home from '@views/home/index.vue'

const router = createRouter({
  history: createWebHistory(import.meta.env.BASE_URL),
  routes: [
    {
      path: '/',
      name: 'Home',
      component: Home
    }, {
      path: '/user',
      name: 'User',
      component: () => import('@views/user/index.vue')
    }, {
      path: '/login',
      name: 'Login',
      component: () => import('@views/login/index.vue')
    }
  ]
})

export default router
home.vue,其他两个页面一样
<template><div class=""><h1>Home</h1></div>
</template>

<script setup lang='ts'>
import {} from 'vue'

</script>

<style lang="scss" scoped>

</style>
创建 Navigation 组件
components/layout/Navigation/index.vue
<template><div class="navigation"><ul><li><router-link to="/">Home</router-link></li><li><router-link to="/user">User</router-link></li><li><router-link to="/login">Login</router-link></li></ul></div>
</template>

<script setup lang='ts'>
import {} from 'vue'

</script>

<style lang="scss" scoped>
  .navigation {
    ul {
      display: flex;

      li {
        font-size: 18px;
        margin-right: 20px;
      }
    }
  }
</style>
然后在 App.vue 中导入
<template><div class="app"><Navigation></Navigation><RouterView /></div>
</template>

<script setup lang="ts">
import { RouterView } from 'vue-router'
import Navigation from './components/layout/Navigation.vue'
</script>

<style lang="scss" scoped>
.app {
  min-height: 100vh;
}
</style>
到现在就是这样的了

Vuex(状态管理)
如何优雅的编写 Vuex
安装 vuex
yarn add vuex@next --save使用
在 vue3.0 中 使用 vuex 体验的并不是很好,下面我们会使用 pinal 这个库来帮助我们更优雅的使用 vuex
如果不使用 pinal,可参考官方文档来使用 vuex:
https://next.vuex.vuejs.org/zh/guide/
我这里选择使用 pinal:
介绍
Pinia 是一个用于 Vue 的状态管理库,类似 Vuex, 是 Vue 的另一种状态管理方案
Pinia 始于2019 年 11 月左右,通过 Composition API重新设计 Vue Store 的外观。从那时起,初始原则仍然相同,但Pinia适用于Vue 2和Vue 3,不需要您使用组合API。除了安装和SSR外,API都是一样的,这些文档针对Vue 3,必要时提供有关Vue 2的注释,以便Vue 2和Vue 3用户可以阅读!
为什么使用 pinia
Pinia 是 Vue 的存储库,它允许您跨组件/页面共享状态。如果您熟悉 Composition API,您可能认为您已经可以共享具有简单 export const state = reactive({}) 的全局状态。
关于 Pinia 的其他问题,我在这里不再做过多赘述,如果有其他问题,可以点击下面的链接访问官网
安装 pinia
yarn add pinia搭建
创建下面的文件
src/store/index.ts
import type { App } from 'vue'
import { createPinia } from 'pinia'
export const store = createPinia()

export function initStore(app: App<Element>) {
  app.use(store)
}
main.ts
import { initStore } from './store'
const app = createApp(App)
initStore(app)
app.mount('#app')
模块化:
store/modules/user.ts
import { defineStore } from 'pinia'
import { LanguageEnum } from '../../enums/appEnum'
import { UserInfo } from '../../types/store';
import { useSettingStore } from './setting'
import { useWorktabStore } from './worktab'

interface UserState {
  language: LanguageEnum     // 语言
  isLogin: boolean           // 是否登录
  info: Partial<UserInfo>    // 用户信息
}

export const useUserStore = defineStore({
  id: 'userStore',
  state: (): UserState => ({
    language: LanguageEnum.CN,
    isLogin: false,
    info: {}
  }),
  getters: {
    getUserInfo(): Partial<UserInfo> {
      return this.info
    },
    getSettingState() {
      return useSettingStore().$state
    },
    getWorktabState() {
      return useWorktabStore().$state
    }
  },
  actions: {
    setUserInfo(info: UserInfo) {
      this.info = info
    }
  }
})
使用:
import { useUserStore } from "../../store/modules/user"
const userStore = useUserStore()

// 获取数据
const isLogin = userStore.isLogin

const language = computed(() => userStore.language)

// 修改 state
userStore.setUserInfo(...)

// 或者使用 $patch 修改
userStore.$patch({
  language: 'CN',
  isLogin: true,
  info: {
    name: 'jack',
    age: '22'
  }
})

// getter
userStore.getUserInfo()
如何操作其他模块?
import { useSettingStore } from './setting'

getters: {
  getSettingState() {
    return useSettingStore().$state
  }
},
actions: {
  initState() {
    let setting = this.getSettingState
  }
}
通过 useSettingStore().glopThemeType 获取 setting 模块中的单个数据
通过 useSettingStore().$state 获取 setting 模块中的所有数据
通过 useSettingStore().setLanguage() 调用 setting 模块中的方法
.env 文件
根目录创建 .env、.env.development、.env.production 三个文件
.env 全局默认配置文件,不论什么环境都会加载合并
.env.development 开发环境下的配置文件
.env.production 生产环境下的配置文件
.env.test 测试环境
我这边暂时不需要使用测试环境,所以 env.test 暂时不创建了
.env
# 端口号
VITE_PORT = 5137

# 网站前缀
VITE_BASE_URL = /art_design_pro/

# API
VITE_API_URL = http://127.0.0.1:8080
.env.development
# 网站前缀
VITE_BASE_URL = /any_design_pro/

# API
VITE_API_URL = http://127.0.0.1:8080

# Delete console
VITE_DROP_CONSOLE = false
.env.production
# 网站前缀
VITE_BASE_URL = /any_design_pro/

# API
VITE_API_URL = http://127.0.0.1:8080

# Delete console
VITE_DROP_CONSOLE = true
env 智能提示
根目录下 env.d.ts,在其他地方使用的时候就能智能提示出我们上面定义的变量了
/// <reference types="vite/client" />


// .env ts 智能提示
interface ImportMetaEnv {
  readonly VITE_APP_TITLE: stringreadonly VITE_REQUEST_BASE_UR: string
}

interface ImportMeta {
  readonly env: ImportMetaEnv
}

declare module '*.vue' {
  import { DefineComponent } from 'vue'const component: DefineComponent<{}, {}, any>
  export default component
}
.vue文件使用,现在我们可以看到有智能提示了

axios(网络请求)
安装
yarn add axios封装
src/utils/http/index.ts
import axios, { type AxiosRequestConfig, type AxiosResponse, type AxiosError } from 'axios';
import { getMessage } from './msg';

// 创建 axios 实例
const axiosInstance = axios.create({
  baseURL: import.meta.env.VITE_API_URL,  // 请求地址前缀部分timeout: 30000, // 请求超时时间(毫秒)headers: {get: {
      'Content-Type': 'application/x-www-form-urlencoded;charset=utf-8'
    },
    post: {
      'Content-Type': 'application/json;charset=utf-8'
    }
  },
  withCredentials: true,  // 异步请求携带cookietransformRequest: [(data) => {
    data = JSON.stringify(data)
    return data
  }],
  validateStatus() {
    return true
  },
  transformResponse: [(data) => {
    if (typeof data === 'string' && data.startsWith('{')) {
      data = JSON.parse(data)
    }
    return data
  }]
})

// request 拦截器
axiosInstance.interceptors.request.use((config) => {
  //获取token,并将其添加至请求头中let token = localStorage.getItem('token')if (token) {
    config.headers.Authorization = `${token}`
  }
  return config
}, (error) => {
  // 错误抛到业务代码
  error.data = {}
  error.data.msg = '服务器异常,请联系管理员!'return Promise.resolve(error)
})

// response 拦截器
axiosInstance.interceptors.response.use((response: AxiosResponse) => {
  let msg = ''const status = response.status

  if (status < 200 || status >= 300) {
    msg = getMessage(status)
    if (typeof response.data === 'string') {
      response.data = { msg }
    } else {
      response.data.msg = msg
    }
  }
  return response
}, (error) => {
  if (axios.isCancel(error)) {
    console.log('repeated request: ' + error.message)
  } else {
    error.data = {}
    error.data.msg = '请求超时或服务器异常,请检查网络或联系管理员!'// ElMessage.error(error.data.msg)  // ElementMessage 抛出错误
  }
  return Promise.reject(error)
})

// 请求
function request<T = any>(config: AxiosRequestConfig): Promise<T> {
  return new Promise((resolve, reject) => {
    axiosInstance.request({ ...config }).then((
      res: AxiosResponse
    ) => {
      try {
        resolve(res.data);
      } catch (err) {
        reject(err || new Error('request error!'));
      }
    }).catch((e: Error | AxiosError) => {
      if (axios.isAxiosError(e)) {

      }
      reject(e);
    });
  })
}

function get<T = any>(config: AxiosRequestConfig): Promise<T> {
  return request({ ...config, method: 'GET' });
}

function post<T = any>(config: AxiosRequestConfig): Promise<T> {
  return request({ ...config, method: 'POST' });
}

function put<T = any>(config: AxiosRequestConfig): Promise<T> {
  return request({ ...config, method: 'PUT' });
}

function del<T = any>(config: AxiosRequestConfig): Promise<T> {
  return request({ ...config, method: 'DELETE' });
}

export default {
  get,
  post,
  put,
  del
}
src/utils/http/msg.ts
export const getMessage = (status: number) => {
  let msg = ''switch (status) {
    case 400:
      msg = '请求错误(400)'breakcase 401:
      msg = '未授权,请重新登录(401)'breakcase 403:
      msg = '拒绝访问(403)'breakcase 404:
      msg = '请求出错(404)'breakcase 408:
      msg = '请求超时(408)'breakcase 500:
      msg = '服务器错误(500)'breakcase 501:
      msg = '服务未实现(501)'breakcase 502:
      msg = '网络错误(502)'breakcase 503:
      msg = '服务不可用(503)'breakcase 504:
      msg = '网络超时(504)'breakcase 505:
      msg = 'HTTP版本不受支持(505)'breakdefault:
      msg = `连接出错(${status})!`
  }
  return `${msg},请检查网络或联系管理员!`
}
api
src/types/axios.d.ts
// 接口返回最外层数据结构
export interface Result<T = any> {
  code: number;
  data: T;
  error: string,
  msg: string;
}
src/api/loginApi.ts
import request from '@/utils/http'
import type { Result } from '../types/axios'
import type { captchaType } from './model/captchaModel'

// login
export class LoginService {
  static getCaptcha() {
    return request.post<Result<captchaType>>({
      url: '/api/captcha'
    })
  }
}
/src/api/model/captchaModel.ts
export interface captchaType {
  captchaId: string
  picPath: string
}
Vite 配置代理
import { defineConfig, loadEnv } from 'vite'

export default ({ mode }: { mode: string }) => {
  const root = process.cwd()
  const env = loadEnv(mode, root)
  const { VITE_PORT, VITE_API_URL } = env

  return defineConfig({
    server: {
      port: parseInt(VITE_PORT),  // 端口号
      host: true,
      proxy: {
        '/api': {
          target: VITE_API_URL,
          changeOrigin: true,
          rewrite: path => path.replace(/^\/api/, '')
        }
      }
    }
  })
}
页面调用
import { reactive } from 'vue'
import { LoginService } from "../../api/loginApi"
import { onMounted } from 'vue'

const captcha = reactive({
  picPath: '',
  captchaId: ''
})

const getCaptcha = async () => {
  const res = await LoginService.getCaptcha()
  let { picPath, captchaId } = res.data
  captcha.picPath = picPath
  captcha.captchaId = captchaId
  console.log(res.data)
}

onMounted(() => {
  getCaptcha()
})
使用 iconfont
1.下载 iconfont
2.导入到项目中
将下载的文件导入到项目下/assets/icons/icons目录下
我这边需要多种图标所以在 icons 目录下也创建了一个icons目录,后面会有 element、system 等图标
3.main.ts导入
import "@icons/icons/iconfont.css"                  // 系统提供的图标库
import "@icons/icons/iconfont.js"                   // 彩色图标
4.使用
// 普通图标
<span class="iconfont"></span>
// 彩色图标
<svg class="svg-icon" aria-hidden="true"><use xlink:href="#icon-zhaopian-copy"></use>
</svg>ElementPlus
安装
yarn add element-plus
yarn add @element-plus/icons-vue
main.ts
import ElementPlus from 'element-plus'              // Element ui
import 'element-plus/dist/index.css'                // Element css
import zhCn from 'element-plus/es/locale/lang/zh-cn'
import * as ElementPlusIconsVue from '@element-plus/icons-vue'

app.use(ElementPlus, { locale: zhCn, size: 'default', zIndex: 3000 })

for (const [key, component] of Object.entries(ElementPlusIconsVue)) {
  app.component(key, component)
}
构建导航
之前的配置都是开发项目要准备的东西,从这里开始就进入了项目的正真开发工作了
这一章我们来开发导航栏
TopBar(导航栏)
效果图

创建两个文件
components/layout/TopBar/index.vue
components/layout/TopBar/style.scss
TopBar/index.vue
<template><div class="top-bar"><div class="bar"><div class="left-bar"><i class="menu-btn btn iconfont-sys"></i><i class="refersh-btn btn iconfont-sys"></i><Breadcrumb></Breadcrumb></div><div class="right-bar"><div class="search-wrap"><el-input v-model="searchVal" placeholder="搜索" clearable /></div><div class="user-wrap"><img class="cover" src="@imgs/user/avatar.png" style="float: left" @click="goPage('/user/user')" />
<el-dropdown @command="goPage"><div class="name"><span>John Snow</span></div><template #dropdown><el-dropdown-menu><el-dropdown-item command="/user/user"><i class="menu-icon iconfont-sys"></i><span class="menu-txt">个人中心</span></el-dropdown-item><el-dropdown-item command="loginOut"><i class="menu-icon iconfont-sys"></i><span class="menu-txt">退出登录</span></el-dropdown-item></el-dropdown-menu></template></el-dropdown></div>
<div class="screen" @click="fullScreenFun" v-if="!isFullScreen"><i class="iconfont-sys btn"></i></div><div class="screen" @click="exitScreenFun" v-else><i class="iconfont-sys btn"></i></div><div class="notice notice-btn" @click="visibleNotice"><i class="iconfont-sys notice-btn btn"></i><span class="count notice-btn"></span></div>
<div class="lang" v-if="true"><el-dropdown @command="changeLanguage"><i class="iconfont-sys btn"></i><template #dropdown><el-dropdown-menu><el-dropdown-item command="cn"><span class="menu-txt">中文</span></el-dropdown-item><el-dropdown-item command="en"><span class="menu-txt">English</span></el-dropdown-item></el-dropdown-menu></template></el-dropdown></div><div class="setting-btn" @click="openSetting"><i class="iconfont-sys btn"></i></div></div></div></div>
</template>
<script setup lang='ts'>
import { ref } from 'vue'
import Breadcrumb from '../Breadcrumb/index.vue'
import { fullScreen, exitScreen } from '@/utils/utils'
const searchVal = ref('')
const darkVal = ref(false)
const isFullScreen = ref(false)
const goPage = (url: string) => {
}
const changeLanguage = () => {
}
const openSetting = () => {
}
// 全屏
const fullScreenFun = () => {
fullScreen()
isFullScreen.value = true
}
// 退出全屏
const exitScreenFun = () => {
exitScreen()
isFullScreen.value = false
}
const visibleNotice = () => {
}
</script>
<style lang="scss" scoped>
@import './style.scss';
</style>style.scss
.top-bar {
  border-bottom: 1px solid #ccc;

  .bar {
    @include flex-between;

    .iconfont-sys {
      font-size: 19px;
    }

    .btn {
      display: inline-block;
      padding: 0 20px;
      height: 60px;
      line-height: 60px;
      text-align: center;
      cursor: pointer;
      transition: all .2s;

      &:hover {
        color: var(--main-color);
      }
    }

    .left-bar {
      @include flex-between;

      .refersh-btn {
        &:hover {
          animation: rotate180 0.6s;
        }
      }

      i {}
    }

    .right-bar {
      @include flex-between;

      .search-wrap {}

      .user-wrap {
        @include flex-between;

        .name {
          cursor: pointer;
        }

        .cover {
          width: 36px;
          height: 36px;
          border-radius: 50%;
          background: #eee;
          margin: 0 15px 0 15px;
          overflow: hidden;
          cursor: pointer;
        }
      }

      .setting-btn {
        &:hover {
          animation: rotate180 0.6s;
        }
      }
    }
  }
}

@keyframes rotate180 {
  0% {
    transform: rotate(0);
  }
  100% {
    transform: rotate(180deg);
  }
}
utils.ts
// 全屏
export function fullScreen(){
  let el: any = document.documentElement;
  let rfs = el.requestFullScreen || el.webkitRequestFullScreen || el.mozRequestFullScreen || el.msRequestFullScreen;

  if (rfs) {
    rfs.call(el);
  }
}

//退出全屏
export function exitScreen(){
  let el: any = document;
  let cfs = el.cancelFullScreen || el.webkitCancelFullScreen || el.mozCancelFullScreen || el.exitFullScreen;

  if (cfs) {
    cfs.call(el);
  }
}

// 将hex颜色转成rgb  例如(#F55442, 1)
export function hexToRgba(hex: string, opacity: number) {
  let RGBA = "rgba(" + parseInt("0x" + hex.slice(1, 3)) + "," + parseInt("0x" + hex.slice(3, 5)) + "," + parseInt( "0x" + hex.slice(5, 7)) + "," + opacity + ")";
  return {
      red: parseInt("0x" + hex.slice(1, 3)),
      green: parseInt("0x" + hex.slice(3, 5)),
      blue: parseInt("0x" + hex.slice(5, 7)),
      rgba: RGBA
  }
}

// 将rgb颜色转成hex  例如(24,12,255)
export function rgbToHex(r: any,g: any,b: any) {
  let hex = "#" + ((1 << 24) + (r << 16) + (g << 8) + b).toString(16).slice(1);
  return hex
}

// 颜色混合
export function colourBlend(c1: string, c2: string, ratio: any) {
  ratio = Math.max(Math.min(Number(ratio), 1), 0)
  let r1 = parseInt(c1.substring(1, 3), 16)
  let g1 = parseInt(c1.substring(3, 5), 16)
  let b1 = parseInt(c1.substring(5, 7), 16)
  let r2 = parseInt(c2.substring(1, 3), 16)
  let g2 = parseInt(c2.substring(3, 5), 16)
  let b2 = parseInt(c2.substring(5, 7), 16)
  let r: any = Math.round(r1 * (1 - ratio) + r2 * ratio)
  let g: any = Math.round(g1 * (1 - ratio) + g2 * ratio)
  let b: any = Math.round(b1 * (1 - ratio) + b2 * ratio)
  r = ('0' + (r || 0).toString(16)).slice(-2)
  g = ('0' + (g || 0).toString(16)).slice(-2)
  b = ('0' + (b || 0).toString(16)).slice(-2)
  return '#' + r + g + b
}
Breadcrumb(面包屑)
<template><div class="breadcrumb"><ul><li v-for="(item, index) in breadList" :key="index"><span>{{ item.meta.title }}</span><i v-if="index !== breadList.length - 1">/</i></li></ul></div>
</template>

<script setup lang="ts">
import { ref, watch } from "vue"
import { useRoute } from "vue-router"

const route = useRoute()
const breadList: any = ref([])

watch(() => route.path, () => {
  getBreadcrumb()
}, {
  immediate: true
})

function isHome(route: any) {
  return route?.name === "Home"
}

function getBreadcrumb() {
  let { matched } = route
  let list: any = []

  //如果不是首页if (!isHome(matched[0])) {
    matched.map(item => {
      let { path, meta } = item
      list.push(
        {
          path,
          meta
        }
      )
    })
  }
  breadList.value = list
}
</script>

<style lang="scss" scoped>
@import './style.scss';
</style>
style.scss
.breadcrumb {
  margin-left: 10px;

  ul {
    display: flex;

    li {
      font-size: 13px;

      span {
        font-size: 13px;
      }

      i {
        font-size: 13px;
        margin: 0 7px;
      }
    }
  }
}